Step by Step Guide to Making Your First Handmade Pottery Piece
If you’re interested in shaping clay into something special, you’re about to begin a hands-on and fulfilling project. Making your own pottery connects you to a craft that has been practiced for thousands of years and lets you express your own ideas physically. It takes some patience, an open mind, and a bit of creativity.
Think of it as creating a conversation with the earth-turning a raw lump of clay into something that is yours alone. Whether you want to make a simple bowl, a fun mug, or a piece of sculpture, this guide will cover all the main steps, from picking your clay to firing your finished work.
Pottery offers many creative options-you can make both useful objects and decorative pieces. Holding a finished piece that you shaped from start to end feels very rewarding. It’s a hands-on process, very different from buying factory-made items.
If you make even one piece, you’ll probably see items like Boleslawiec Polish pottery in a totally new way after going through the steps yourself.
Getting Ready to Make Your First Pottery Piece
Pottery is satisfying because it allows you to create and focus your mind on something practical. Working with clay helps you relax and encourages you to explore your own ideas, whether you have art experience or not.
Each time you make something, you leave a unique mark on it. You have the chance to let your personality come through in your work, making the final piece special and meaningful to you.
What Do Beginners Need for Tools and Equipment?
You don’t need fancy tools or a big studio to begin. For hand-building pottery (which we’ll go over more in this guide), you only need a few basic items.
Useful tools include a wire for cutting clay, a wooden rib for shaping and smoothing, a sponge to manage moisture, a trimming tool to tidy the shape, a needle-like tool for marking and details, and a clay scraper. Many of these can be substituted with things from your kitchen or craft supplies.
If you want to try using a pottery wheel, you’ll need one. However, starting with hand-building tends to be easier and less expensive. To finish your piece, you’ll also need your work to be fired in a kiln. Most local studios or art centers can fire your pieces for a small fee if you don’t have a kiln yourself.
How Much Space Is Needed for Making Pottery at Home?
The amount of space depends on your project and your technique. For most hand-building, a sturdy table or even a kitchen counter can be enough. It’s best to find a flat, well-lit place with good air flow, and you’ll need some room to let your pieces dry safely.
If you eventually get a pottery wheel, you’ll need more space around it so you can move easily as you work. In any case, remember that pottery is a bit messy, so choose a spot you can tidy up easily and don’t mind getting dirty.
Picking the Best Clay for Your Pottery
Before you start making anything, you need to choose the right clay. This choice affects how your clay feels while you work with it, what temperatures you’ll need for firing, and what the finished piece will be like. Your clay is the base for everything that comes after.
While there are many kinds of clay, most fall into a few main types, and each is suited for different projects. Understanding the differences will help you make the right decision now and for any future projects.
Earthenware, Stoneware, and Porcelain: What’s the Difference?
|
Type |
Features |
Best For |
|
Earthenware |
Absorbs water, lower firing temperature, easy to work with |
Decorative items, beginner practice |
|
Stoneware |
Stronger, non-porous when fired at high temperature |
Everyday items like mugs and vases |
|
Porcelain |
Very white, smooth, tough when fired, higher skill needed |
Fine art pieces and special functional ware |
Which Clay Should You Pick Based on What You’re Making?
If you want to make plates, bowls, or mugs you’ll use for food, stoneware is usually the best choice because it is strong and doesn’t absorb liquids after being fired.
Earthenware is good for learning and making decorative objects, but if you want it to be watertight or food-safe, it needs to be well-glazed.
Porcelain is best saved for later once you’re comfortable working with clay-it’s tougher to shape but can look very elegant.
Getting Your Clay Ready: Wedging and Conditioning
Once you have picked your clay, the next important task is prepping it. If you skip this part, your piece may not turn out as expected. Preparing clay makes it easier to work with and keeps your finished piece strong.
The main way to condition your clay is called wedging. It’s similar to kneading dough, and it’s an important job before you start forming shapes.
Why Do You Need to Wedge Clay?
Wedging removes air pockets that can make your pottery crack or explode in the kiln. It also mixes the clay so it is the same texture throughout, which helps it dry and fire more evenly. Well-wedged clay is smoother and easier to turn into what you want.
How Do You Wedge Clay?
There are a few common wedging methods, but beginners often use the rams-head or ox-head technique. You push and fold the clay over and over in a rolling motion, pressing out air bubbles and creating a spiral pattern inside the clay.
Another way is to slice the clay with a wire and press the pieces back together. It’s good practice to wedge your clay for about 5 minutes. You’ll know it’s ready when you cut through it and see no air holes, and the texture feels even and smooth.
Choosing a Method to Shape Your Clay
Once your clay is prepared, you can start to shape it. There are two main ways: hand-building and using a wheel. Each lets you make different types of pieces and gives a different experience.
For your first few tries, think about which style suits you and what seems easiest with the tools you have.
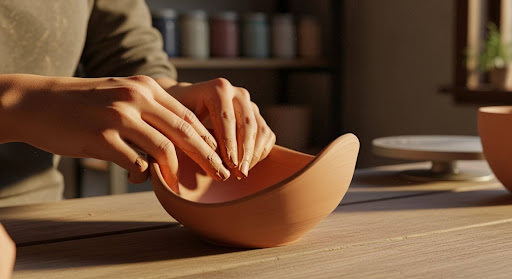
Which Is Easier for Beginners: Pinch Pot, Coil, Slab, or Wheel?
- Pinch pot: Start with a clay ball, poke your thumb in the middle, and pinch the walls to form a pot.
- Coil pot: Roll clay into long ropes, stack them, and smooth them together.
- Slab construction: Roll clay into flat sheets, cut shapes, and join them for boxes or more angular forms.
- Wheel throwing: Try if you have access to a pottery wheel and want to make very round, smooth pieces, but it needs a bit more practice.
Comparing Hand-Building vs. Wheel Throwing
|
Hand-Building |
Wheel Throwing |
|
Simple tools, can work anywhere, more relaxed and allows for unique shapes, best for smaller pieces and beginners. |
Needs a pottery wheel, creates even and round forms, faster once you learn, but takes more practice to get started. |
Forming Your First Pottery Piece
This is the fun part! Now you’ll see your lump of clay turn into an object. This stage asks for care and patience, and it’s normal to make a few mistakes as you go.
Sometimes the clay does unexpected things, so try to work calmly and adjust as you go.
Tips for Keeping Clay Easy To Shape
- Keep your clay moist by having a wet sponge or dish of water nearby, but don’t get it too wet or it will be floppy.
- If you’re making something large, cover parts you’re not working on with plastic so they don’t dry out too soon.
How To Avoid Common Shaping Problems
- Don’t rush or force the clay, or you’ll get cracks or weak spots.
- Try to keep the walls of your bowl or mug the same thickness all around.
- If joining two clay pieces (like coils or slabs), scratch both surfaces with a tool (“scoring”) and brush them with a bit of wet clay (“slip”) before pressing together. This gives a stronger join.
Finishing and Adding Your Own Touch
Once your basic shape is done, it’s time to smooth it, trim it, or add details before you let it dry. This is where you can add grooves, handles, decorations, or your initials.
Making small improvements at this point will show in the final product, so don’t hurry this step.
How To Smooth, Trim, and Decorate Your Piece
- Wait until your clay is “leather hard”-not wet, but not fully dry. It should still be a bit flexible.
- Use tools to trim the base or shape details. Sponge or use a rib tool to smooth the walls and edges.
- If adding handles or extra decorations, always score and slip both surfaces before pressing together.
- Mark or sign your piece while it is still soft, especially if you are sharing kiln space with others.
Drying: Keeping Your Pottery from Cracking
After shaping, your piece needs to dry completely before it can be fired. Rushing this step often causes cracks. Clay shrinks as it dries, and uneven drying causes stress.
The key is to let your piece dry slowly and evenly.
How To Dry Pottery Safely
- Cover your work loosely with plastic so it dries slowly.
- Keep your pottery out of direct sunlight, heat vents, or drafts.
- Uncover the piece a little more each day so it continues to dry evenly.
Why Pottery Cracks and How To Stop It
- Different wall thicknesses make some parts dry faster, leading to cracks-try to keep it even.
- Not wedging can leave air inside, which expands and causes cracks or breaks during drying and firing.
- Once drying has started, try not to move or touch your piece too much, especially at thinner sections.
Bisque Firing: The First Kiln Firing
Once your pottery is fully dry, it’s ready for its first firing, called the bisque firing. This step changes the clay from soft and crumbly to hard and ready for glazing.
During this firing, the clay becomes solid but still slightly porous, which helps it absorb glaze in the next step.
What Happens to Clay in Bisque Firing?
Bisque firing takes your piece up to about 950-1160°C (1742-2120°F). This heat drives out the last bits of trapped water and changes the clay chemically, making it strong enough to handle glazing and a second firing. Afterward, your piece is called “bisqueware.”
This step prepares your pottery for glazing, taking you one big step closer to a finished piece.
Decorating and Glazing Your Pottery
After bisque firing, you can color and protect your pottery with glaze. This step lets you add personal design, texture, and a shiny or matte finish. A glaze is a thin layer of liquid that turns into a smooth, glass-like coating when fired.
How To Put Glaze On: Dipping, Painting, Pouring, and Spraying
- Dipping: Dip your piece into a bucket of glaze for an even coat.
- Painting: Use brushes to add glaze in patterns or layers.
- Pouring: Pour glaze over your piece for drips or special effects.
- Spraying: Use a spray bottle or airbrush for very smooth or blended finishes.
Some people also use underglaze (color applied before final firing, then covered with clear glaze), or decorate with slip (liquid clay), or carve designs into the piece. Just remember that some glazes (especially those with heavy metals) can have environmental impacts, so check your materials.
Why Must You Wipe the Base Before Glaze Firing?
If you leave glaze on the bottom of your pot, it will stick to the kiln shelf like glue when fired. Scrape or sponge off any glaze where your pottery will touch the kiln or shelf, or you risk breaking your piece or damaging the equipment.
Glaze Firing: Turning Bisqueware into Finished Pottery
The last firing, known as glaze firing, is where your piece gets its final look and strength. The increased heat melts the glaze, creating a tough, shiny (or sometimes satin or matte) surface that’s waterproof and safe for eating or display.
How Is Glaze Firing Different Than Bisque Firing?
- Bisque firing: Changes raw clay into pottery and makes it porous for easy glazing.
- Glaze firing: Melts glaze into a glassy coating and strengthens the piece, using a higher temperature that depends on your clay and glaze types. For example:
- Low-fire (earthenware): 1020-1180°C (1868-2156°F)
- High-fire (stoneware): 1180-1300°C (2156-2372°F)
Each type of clay has a maximum temperature it can handle, so don’t over-fire, or your piece could melt or deform.
How to Care for and Enjoy Your Pottery
Once your piece is glazed and fired, you can finally use it or show it off! With just a small amount of care, your handmade pottery can be enjoyed for many years-whether it’s for food or decoration.
Knowing if your pottery is safe for food use is an important part of the process.
Is Handmade Pottery Safe for Eating and Drinking?
Food safety depends on the clay and glaze. Stoneware fired hot enough is non-porous and can be food safe if you used a food-safe glaze.
Earthenware is still a bit absorbent after firing, so it must be completely covered with a proper glaze to be safe for food and drink. If you’re unsure, use your item for decoration instead of eating or drinking.
How Do You Clean and Care for Handmade Pottery?
- Use a soft sponge and mild soap for cleaning. Avoid harsh cleaners or scrubbing pads.
- Some pieces can go in the dishwasher, but handwashing will help them last longer.
- Don’t put handmade pottery into very hot or cold water suddenly-a sharp temperature change can break it.
- If your pottery has rough or matte areas, be extra gentle.
Enjoy your pottery, whether you use it every day or display it as art. Either way, it’s something you made from start to finish!
Common Questions About Getting Started With Pottery
Trying pottery for the first time can lead to lots of questions. That’s normal, and even experienced potters still learn from trial and error. Here are some answers for new potters:
What are the most common beginner mistakes?
- Not preparing or wedging the clay properly, leading to trapped air bubbles.
- Letting pottery dry too fast, which causes cracks.
- Making pieces with uneven thickness or not joining parts well enough.
- Forgetting to clean glaze from the base, causing pots to stick to the kiln shelf.
Don’t worry about mistakes-they’re part of learning any craft.
Can you make pottery without a kiln?
- Traditional pottery needs kiln firing to become strong and waterproof. Without it, clay objects don’t last long and won’t be safe for food or liquids.
- You can use air-dry clay for small, decorative items, but they’re fragile and not for food or water.
- If you really want to make functional pottery, check if local art centers or schools will fire your pieces for you.