Deck Construction Process From Start to Finish
Building a deck is an exciting way to enhance the beauty, functionality, and value of your home. Whether you’re looking to create a cozy outdoor space for family gatherings or a sleek entertainment area for guests, understanding the deck construction process from start to finish can help ensure a successful project. Here’s a step-by-step guide to what’s involved.
1. Planning and Design
The first stage of deck construction is careful planning. This includes determining the deck’s purpose, size, shape, and location. Will it overlook a backyard garden, or will it extend from the kitchen for easy access? During this phase, it’s also important to consider local building codes, permits, and safety requirements. Choosing materials is another key aspect—wood, composite, and PVC each have distinct advantages in terms of durability, maintenance, and appearance. A detailed blueprint or 3D design can help visualize the finished deck and avoid costly changes later.
2. Preparing the Site
Once the design is finalized, the next step in the deck construction process is site preparation. This involves clearing the area of any obstacles, leveling the ground, and marking the deck’s layout with stakes and string. Proper site preparation ensures a stable foundation and prevents future problems such as uneven surfaces or drainage issues. If the deck is elevated, excavation may be required to set posts or footings securely into the ground.
3. Installing the Foundation
The foundation is a critical part of any deck. Concrete footings are typically poured to support posts, which act as the main structural element. These posts must be positioned accurately according to the deck plans. For ground-level decks, a simple gravel base or concrete piers may suffice, while elevated decks require deeper footings to handle weight and ensure safety. Ensuring the foundation is level and properly cured is essential before moving to the framing stage.
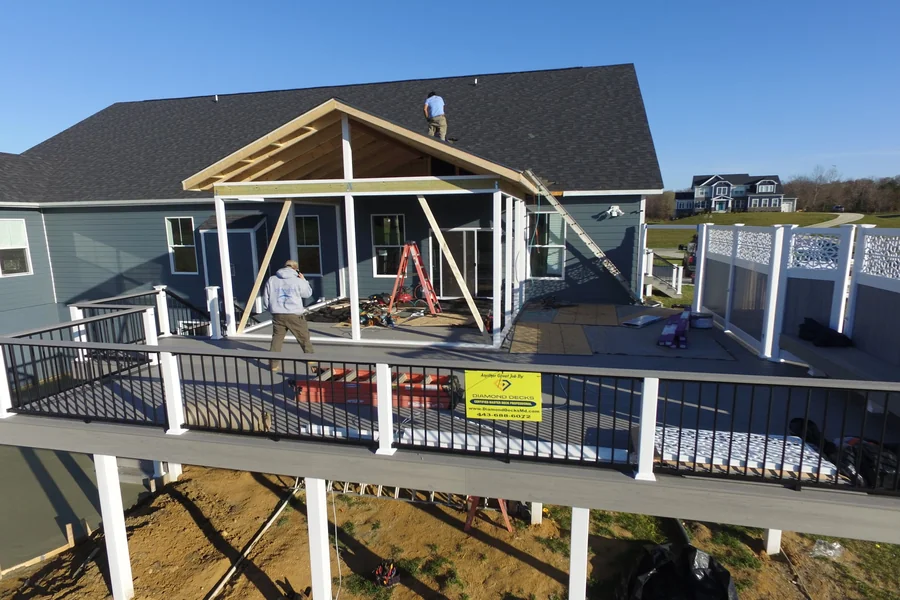
4. Framing the Deck
Framing provides the skeleton of the deck and determines its strength and stability. Joists are attached to the ledger board, which is anchored to the house, and then connected to the support posts. Proper spacing and alignment of joists are essential to prevent sagging or uneven decking later. This stage may also include installing beams for added support, depending on the deck’s size and height.
5. Installing Decking Boards
With the frame in place, decking boards are installed. Whether you’re using pressure-treated wood, composite, or PVC, the boards are typically laid perpendicular to the joists and secured with screws or hidden fasteners. Attention to spacing is important to allow for water drainage and expansion due to weather changes. Staggering the seams of boards can enhance both aesthetics and structural integrity.
6. Adding Railings and Stairs
Safety is a major consideration in deck construction, so railings and stairs are installed next. Railings not only prevent falls but also enhance the deck’s appearance. Depending on design preferences, they can be made from wood, metal, or glass. Stairs should be securely attached and follow local building codes regarding tread depth and riser height.
7. Finishing Touches
The final stage involves finishing touches such as sanding rough edges, applying sealant or stain, and adding decorative elements like lighting or built-in seating. Proper finishing protects the deck from weather damage, extends its lifespan, and gives it a polished look.
Conclusion
From planning and site preparation to framing, decking, and finishing touches, the deck construction process requires careful attention to detail at every stage. By understanding each step, homeowners can ensure a safe, durable, and visually appealing deck that enhances their outdoor living space for years to come. Investing time in the process upfront makes the finished deck both functional and beautiful, providing a perfect spot for relaxation, entertainment, and family enjoyment.